This page is designed to give you a quickstart on getting to know the system and how to work with it simply by following a step-by-step guide.
| Table of Contents |
|---|
Prerequisites
There is not a lot that you need to start these first steps, but it includes a computer and some free time!
Additionally some basic knowledge about terminal usage within Linux (Ubuntu) is assumed. You can find some good starter information on the official Ubuntu documentation, although you should be able to copy all the commands from this tuturial and learn on the go!
Installation
See the installation page for instructions on how to install the system and get it running.
Using the API
Prerequisites
Before you ask, API stands for Application Programming Interface, it describes how to use a system and what it can do, for us this is the place to start as it quickly shows you the power of the system!
To use the API we are going to use a tool called Postman, it is a well-established chrome extension that makes using a REST API a breeze.
If you are using chrome you can find Postman here, if you do not use chrome I suggest you install chrome first ![]()
Steps to take
- Run the OMS system as instructed in the installation guide
- Fire up postman
- Check to see if the system is running and ready to be used
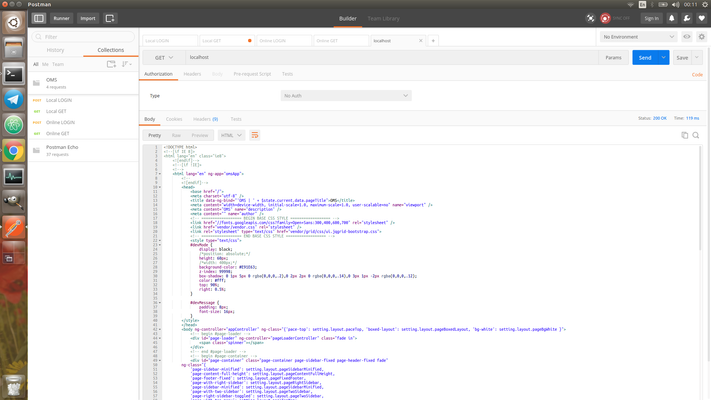
- Enter the URL to be `localhost`
- Set the method to GET (left of the URL)
- Hit Send!
- Check if the response matches screenshot 1 on the left
- Above the response are buttons: (pretty|raw|preview)
- These change the way the response is viewed
- Press preview
- It should look a little bit better now!
- Above the response are buttons: (pretty|raw|preview)
- Log in as a User
- Change the method to POST
- Change the URL to `localhost/api/login`
- Right below the the URL bar are buttons: (authorization|headers|body|pre-request scripts|tests)
- These are tabs to enter additional request settings.
- Note that the response has similar buttons, yet these are for the response!
- Click the body button (of the request)
- Enter 2 new keys
- key='username', value='admin@aegee.org'
- key='password', value='1234'
- Enter 2 new keys
- Hit send!
- Verify the response looks similar to response 1
- See all the Users
- Open a new tab within Postman
- I like to keep one tab open to quickly login
- Set the method to GET
- Set the URL to `localhost/api/users`
- Open the request Header tab
- Enter a new key
- key='X-Auth-Token', value='yourlogintoken'
- Enter a new key
- Hit send!
- You should get a forbidden message
- Enter the correct login token
- Go back to your login request
- Copy the value with the key "data"
- In the example response this is `da78dbb0-6ff4-11e7-bb7e-476b0d476473`
- Paste it in the value for the X-Auth-Token
- Hit Send again!
- Check if the response equals response 2
- Open a new tab within Postman
- See your User
- Keep the GET method
- Keep the X-Auth-Token
- Change the URL to 'localhost/api/users/1'
- Hit Send!
- Check if the response equals response 3
- Create a Users
- Set the method to POST
- Set the URL back to 'localhost/api/bodies'
- Hit Send!
- Check the errors you got
- Go to the Body tab of the request and enter the following keys
- key='type_id', value='1'
- key='address_id', value='1'
- key='name', value='yourfavouritelocal'
- key='email', value='yourfavouriteemailaddress'
- Hit Send!
- Check if your response is similar to response 4
- Check all the Bodies
- Try finding this out yourself!
- Check the rest of the API
Screenshot 1 - Postman
{
    "success": true,
    "meta": null,
    "data": "da78dbb0-6ff4-11e7-bb7e-476b0d476473",
    "message": "User login token"
}
Response 4
CORE-112 - Getting issue details... STATUS
